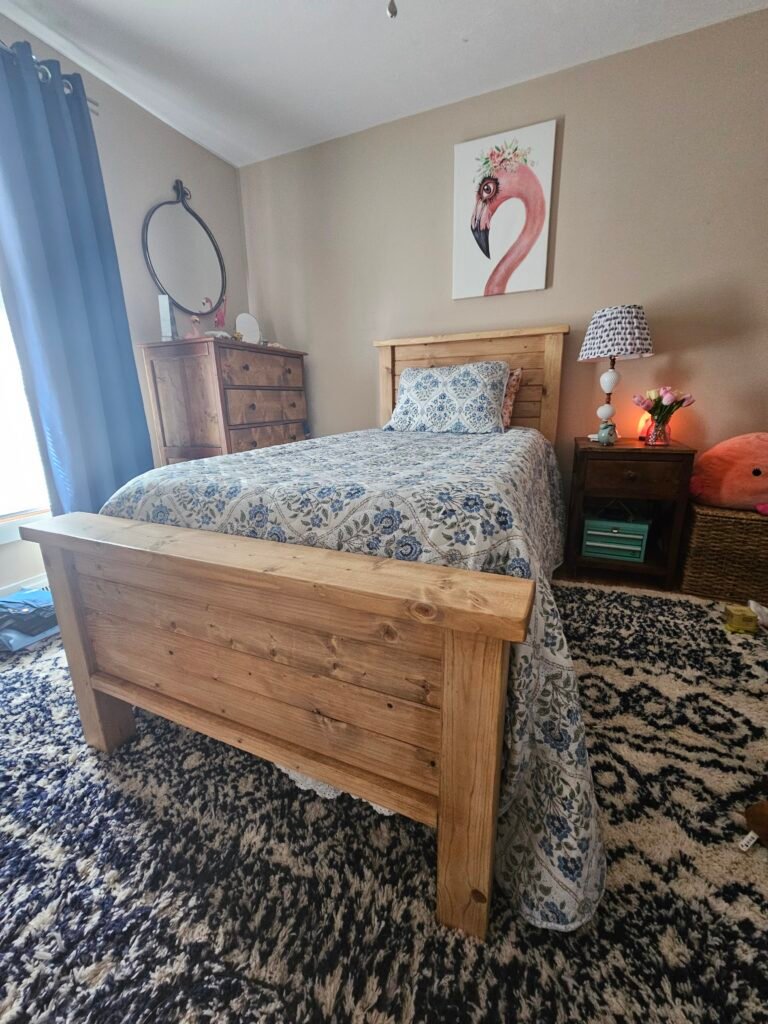
Have you ever looked at the price tags on store-bought bed frames and thought, “There’s no way I’m paying that much for a simple bed!”? We have always felt the same way. Instead of spending hundreds of dollars, years ago we decided to take matters into our own hands and start building our own furniture. And guess what? It wasn’t nearly as difficult as we thought!
If you’re worried that woodworking is complicated or that you don’t have enough skills to pull this off, don’t stress. We’re not professional carpenters either, and we made a sturdy, stylish twin sized bed that cost a fraction of what stores charge. In this guide, we’ll walk you through the entire process—choosing the best lumber, making precise cuts, using simple tools, and putting it all together. Building your own bed can be a great adventure, and by the end, you or your kiddo be sleeping soundly on a bed that you built with your own two hands!
Why Build Your Own Bed?
There are plenty of reasons to DIY your own furniture, but here are the big ones:
- It saves money. High-quality bed frames can cost $500 or more, but we built ours for much less.
- It’s fun and rewarding. There’s something satisfying about sleeping on a bed we built ourselves.
- Customization. We chose the size, color, and design to match our style.
Materials and Tools You’ll Need
Before we get started, let’s go over what we need.

Materials:
- 2x4s and 2x6s for the frame
- 4x4s for the legs
- 1×4 slats for mattress support
- Wood screws or pocket screws
- Wood stain or paint
- Mounting Plates
- Wood Glue
Tools:
- Circular saw or Miter Saw
- Drill
- Sandpaper or power sander
- Measuring tape and pencil
Optional Tools:
These items are optional, but will either make your task easier or make the overall product look better
Now that we have everything ready, let’s dive into the fun part—building the bed!
Step 1: Choosing the Right Lumber
Buying lumber can be tricky, but we learned a few tricks along the way. When shopping at big box stores, always check for straight boards. Warped or twisted boards will make assembly a nightmare. We looked down each piece like a pool cue and chose the ones that were as straight as possible.
Pro Tip: Look for knot-free boards if possible. Knots can weaken the wood and cause cracking over time. I also like to look for pieces that have interesting grain patterns that can really pop out when using your stain of choice.
Step 2: Prepping the Lumber
Once we had our lumber, we needed to cut it down to the right sizes. A circular saw will work great for this when coupled with a quick square, but a miter saw is what we use to make it even easier and quicker.
Here’s what we cut:
- Four legs from the 4x4s
- Side rails from the 2x6s
- Slats from the plywood


We also used a planer to smooth out rough edges and also eliminate all of the blemishes such as the wood stamping you see in the image. These tools can be a little pricey, but go a long way into transforming big box store lumber into something that looks more premium.
We typically do this before making all of our cuts, but the order does not really matter. This part is definately optional if you are on a budget, just may take a bit more sanding at the end.
Taking our time with measuring and cutting helped us avoid mistakes later on. If using a circular saw, make sure you are using a quick square to make nice straight 90 degree lines so that everything will match up when it comes to assembly.
Step 3: Creating Grooves with a Router
This step is also optional, but it gives your bed a more detailed look when completed. We used a router with a chamfer bit on a routing table to carve grooves along the sides of the 2x4s in the frame. If you don’t have a router, you can completely skip this part if you like as it is pretty much all aesthetic. We just love how it gives the bet a more plank look and adds that extra detail.

Step 4: Assembling the Frame

Now it was time to put everything together! A pocket hole jig is a must in my opinion when tackling these types of projects. Although there are other ways to connect the pieces for the frames, this is the most effecient and sturdy option. For this step, all you need to do is use the jig as shown and put two pocket holes into each of the 2x4s.
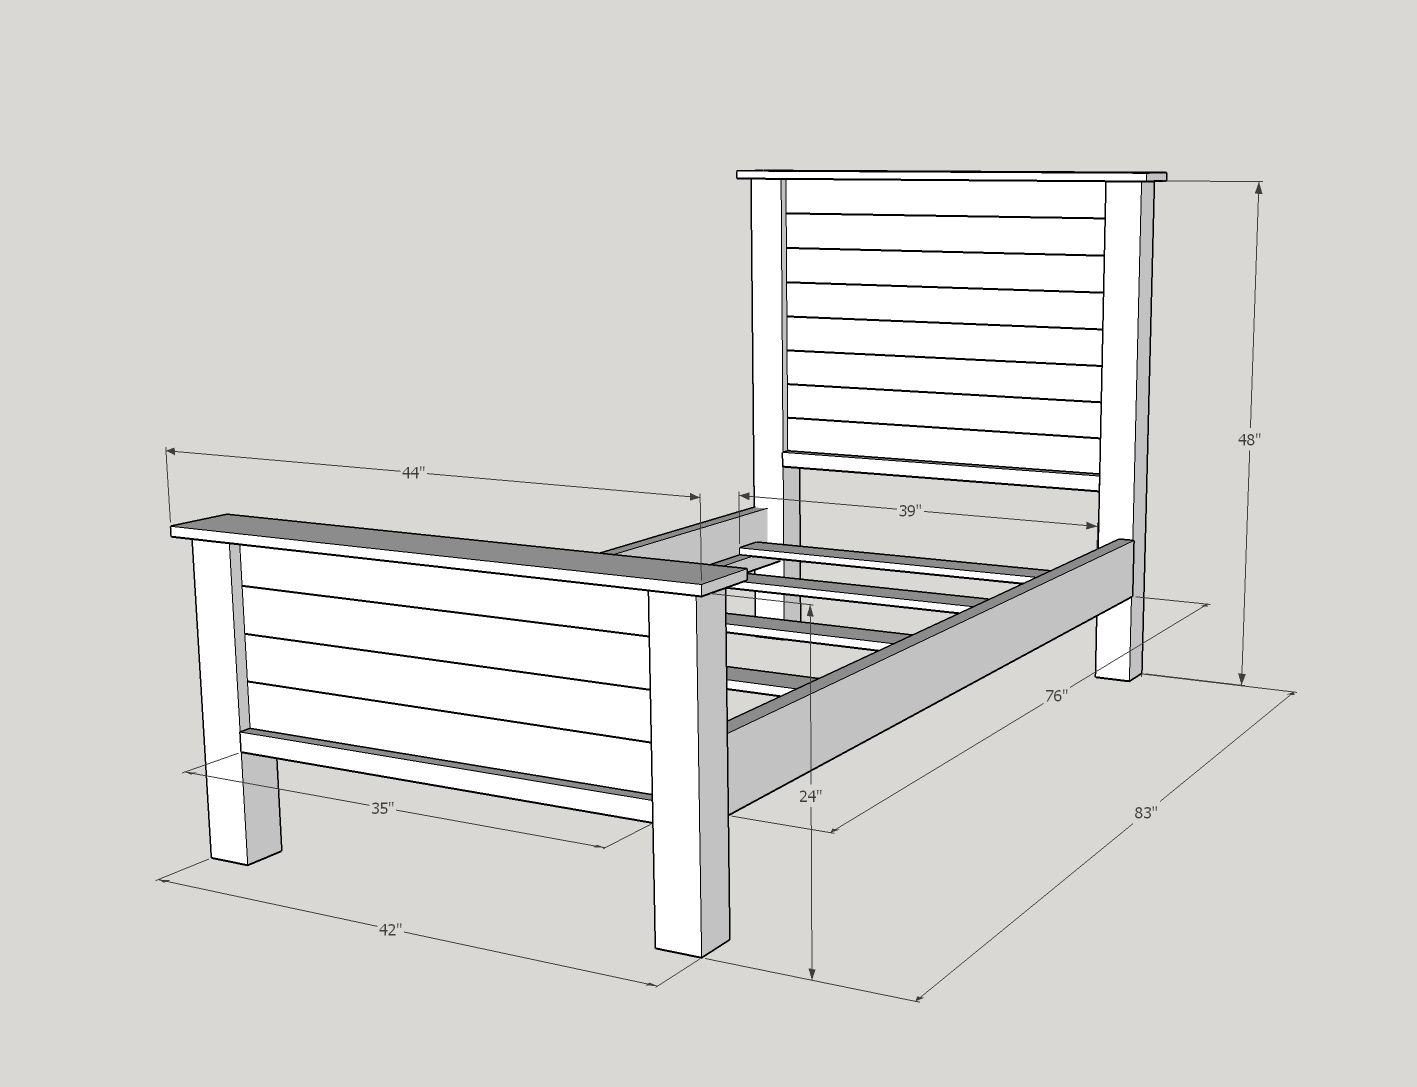
Using the image and the plans provided as a guide, connect all of the 2x4s to the 4×4 legs in the correct pattern using a clamp to pull them tightly together. Use special care to keep all of them aligned when putting them all together. When completed, there will be a 2×6 that is secured to the top using pocket holes and wood glue.


For the side rails, we used our table saw to rip one of the 2x4s in half giving me two 2×2 pieces to lay the slats onto. If you do not have a table saw, most of the big box stores will sell these 2x2s for really cheap, I have just found that this method will save money and give me a much straighter product. Once you have the 2x2s secure them to the bottom of the 2×6 rail using wood screws. and glue.
Step 5: Sanding and Staining
To give our bed a professional finish, we sanded every surface until it was smooth. Sanding is crucial because it removes rough edges and prevents splinters.
Next, we applied a wood stain (Special Walnut) and a polyurethane finish to bring out the natural grain and give it a polished look. If stain isn’t your style, you can paint your bed any color you like! We let it dry completely before moving on to the final step.

Step 6: Final Assembly and the Finished Product

With all the pieces stained and dried, we put everything together for the final time. When attaching the rails to the bed frames, we purchased some 90 angle mounting plates that are pretty inexpensive. These do a great job of supporting everything while making the entire process of putting them together pretty simple.
Once we placed the mattress on top, we stood back to admire our work—our very own handmade bed!
And the best part? It was sturdy, stylish, and built with love. Our girls love these beds and they are extremely sturdy, taking abuse for years and still looking the exact same. This is the third one of these we have put together!

Conclusion
If you’ve ever thought about building your own furniture but felt unsure about your skills, take it from us—you can do this! We had zero experience when we started years ago, and we pulled it off then. It saved us money, gave us a fun weekend project, and left us with a bed we’re proud of.
So what are you waiting for? Grab some lumber, fire up your tools, and start building your dream bed today. Trust us, you’ll never want to buy furniture again!
FAQs
1. Do I need to buy all of the expensive tools to build this bed?
No! A circular saw, drill, and sander are enough to get the basics of this job done.
2. How much did this DIY bed cost?
As of the time of creating this post, this total project cost us about $100 on materials, which is way cheaper than buying a pre-made bed.
3. Can I customize the design?
Absolutely! You can change the size of the bed to make it into a full size or even larger bed, as well as customizing your wood stain colors.
4. How long does it take to build a bed?
It took us a couple of days working around our busy schedule, but with multiple people working on it non-stop, it could definately be done in a day if you have a little experience.
5. Is a DIY bed sturdy?
Yes! With good assembly and strong materials, it can be more sturdy than the store-bought ones.


Leave a Reply
You must be logged in to post a comment.